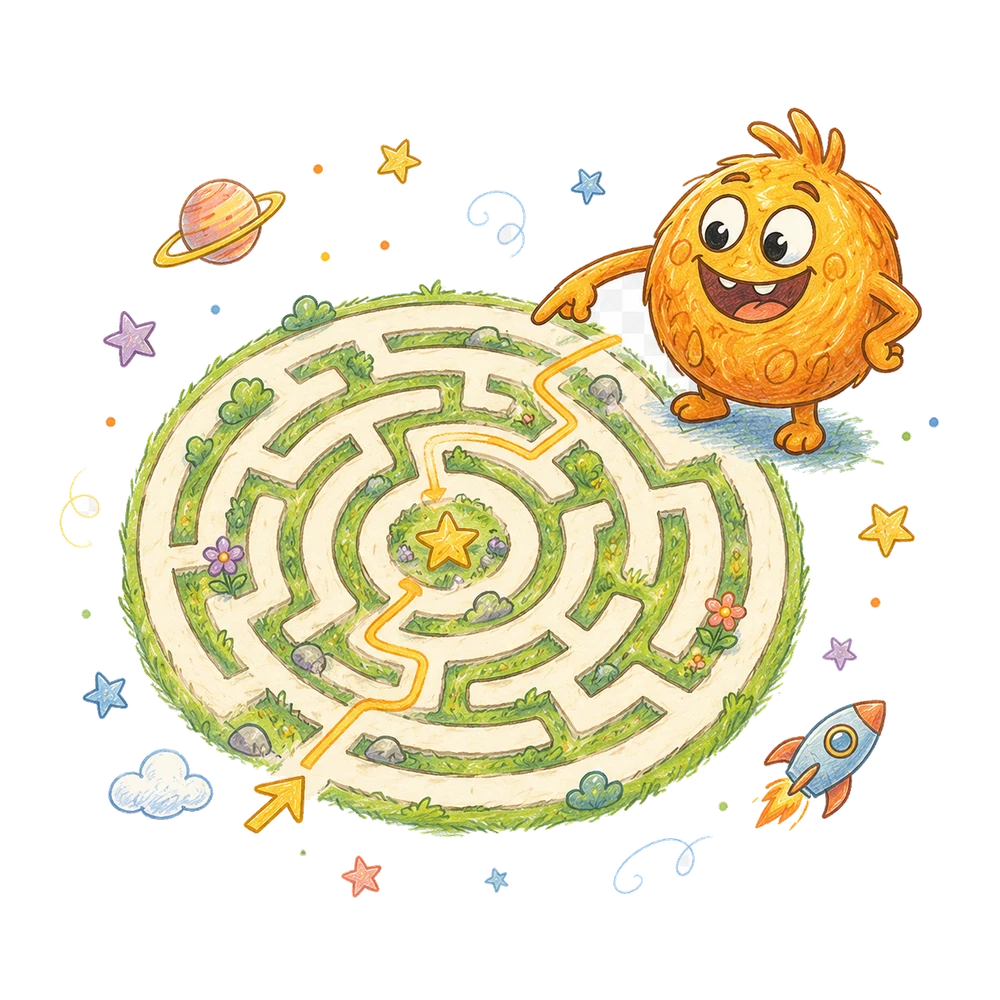
A homemade maze turns a spatial plan into a line that another person can follow. The child starts at a marked entrance, finds a path through open corridors, and draws a route to a marked finish without crossing the walls. The skill is planning and checking a route against a visible layout. A dead end is information about one choice, not a failure of the whole activity. Begin with a large, simple maze whose solution an adult has checked, then let the child point, trace, draw, or direct a helper. This guide also explains when more than one route is valid and how to make the start and finish unambiguous.
Choose a clear maze and rule
Draw a large rectangular area with an entrance on one side and a finish on another. Add a few wall lines that create a clear open path and one dead end. Before offering the maze, trace a complete route yourself to verify that the finish is reachable.
Agree that the drawn route stays within the open corridor and does not cross the wall lines. Mark the start and finish with different symbols or labels. Use high contrast and enough space for the child to distinguish the walls from the route.
A child can trace with a finger before drawing, use a pointer or tactile model, or direct an adult to draw. The route should express the child's choice even when a helper handles the pencil.
Prepare materials
Gather paper, a dark pen for the walls, and a different pencil or marker for the route. A clipboard or firm surface can support the page. A removable counter can represent a traveler if it is safe and accessible for the child.
Make the corridors wider than the route marker and leave a visible gap at the entrance and finish. Avoid tiny spaces or lines that accidentally touch and block the intended path. An adult can prepare the maze in advance.
A transparent sheet over the maze lets the child draw a route and erase it without changing the walls. Alternatively, make a copy of the maze. The child should be able to see which marks are walls and which mark shows the proposed path.
Plan and draw one route
Use a checked maze with one visible entrance, one finish, and a corridor that reaches the finish.
- Point to the entrance and the finish. Ask the child where the route should begin and end.
- Trace the first open corridor with a finger or pointer without drawing yet.
- At a junction, inspect the available paths and choose one.
- If the path reaches a dead end, return to the junction and choose another open corridor.
- Draw the selected route from start to finish, staying between the wall lines.
- Follow the drawn line again and check that it does not cross a wall or leave the maze except at the marked openings.
- If the route crosses a wall or stops early, erase or draw a new line through an open corridor.
- Invite a partner to follow the completed route with a finger and identify the finish.
A conversation at a dead end
Adult: ‘Your line reaches this wall. What choices do you have?’ Child: points back to the junction. Adult: ‘We can return to that junction and try the other open corridor.’ The child chooses the next path.
A dead end does not mean the entire maze is impossible. It shows that the selected branch does not reach the finish in the current layout. Trace back along the route rather than crossing a wall to escape.
If both branches appear blocked, check the drawing. An accidental line may have closed the intended passage. Repair the maze if the material is faulty, then let the child decide how to continue.
Mark the start and finish
Use two distinct symbols, such as a green dot for start and a star for finish, with labels or textures if color alone is not accessible. Explain both symbols before the child begins.
A route from finish to start may also trace a valid corridor in an ordinary maze, but the requested direction should be clear. If the child begins at the finish, point to the agreed start and decide whether to reverse the task or restart.
A maze with several openings can be confusing if only one is intended as the entrance. Close unused gaps or label each opening. A reader should be able to identify where the route is allowed to enter and leave.
Walls and paths are different marks
Draw walls with a dark solid line and the route with a lighter or differently styled line. Explain that the route must remain in the open space between walls, not run along or cross them.
If the route touches a thick wall, decide whether the drawing is clear enough to judge. A broad marker can make a narrow corridor ambiguous. Widen the corridor or use a thinner route line before deciding that the child crossed a wall.
A tactile maze can use raised walls and a separate movable marker. The child may trace the open channel with a finger while a helper records the route. Choose materials that make the two roles distinguishable.
Trace before drawing
Invite the child to explore a possible path with a finger from the start. At a junction, pause and identify the open choices. Tracing is a way to plan without committing a permanent mark.
Once a route reaches the finish, the child can draw it or direct a helper. If the finger path is hard to remember, keep a counter at the current position or draw one segment at a time.
A child may prefer to draw immediately and revise later. Both approaches can work. State that the final route should be checked against the walls and endpoints, regardless of how it was planned.
A route that crosses a wall
If the drawn line goes through a wall, point to the crossing and ask the child to compare the route with the rule. The line reaches the other side, but it does not remain in the open corridor.
Return to the nearest junction and look for an opening. Erase the crossing segment or draw a new route on a copy. The child can decide which open path to try next.
Check the rest of the line after the local repair. A route is valid only if the entire selected path reaches the finish without crossing the stated walls. One corrected crossing does not automatically verify every other segment.
Make the first maze easier
Use a large path with a single gentle turn and no dead end. Mark the entrance and finish clearly. Trace the route together before asking the child to draw or direct a helper.
Provide a wide corridor, high contrast, and a stable page. The child can point, use gaze, move a large counter, or communicate each direction. An adult can draw the line exactly as directed.
One route from start to finish with support is a complete activity. Add a junction only when it gives a useful new choice. Record whether the adult traced first or supplied a visual cue.
Add a more demanding junction
Draw a maze with one branch leading to a dead end and another leading to the finish. Ask the child to predict which branch might work, then trace it to check.
If the first choice is blocked, return to the junction and try the other. The child can mark the dead-end branch lightly or remember it using a token. Do not cross the wall merely to preserve the initial prediction.
A later maze can have two junctions or more than one valid route. Check the layout yourself before use. Increasing complexity should not make the walls or openings inaccessible.
A maze with two valid routes
Design a layout with two open paths from the same entrance to the same finish. Trace both before presenting it. Ask the child to choose one and check it against the walls.
A route can be valid even if it differs from the adult's preferred line. If the task asks for any route, both checked paths satisfy it. If the task asks for the shorter route, define how length will be compared and measure or inspect the paths accordingly.
Do not infer that one route is shorter simply because it has fewer turns. A long straight segment may make that route longer. Use a flexible strip or another consistent method if path length is the question.
A route and a sequence of directions
After drawing a route, describe its segments: ‘Go forward to the junction, turn left, then follow the corridor to the star.’ Agree on the viewpoint used for left and right.
A partner can trace the line while hearing the directions. If a direction is ambiguous, point to the relevant junction or add a landmark. The drawn route and spoken instructions should describe the same path.
The child may create the directions through speech, gesture, or picture cards. A helper can follow them with a counter. Check each turn against the maze rather than assuming that a remembered direction applies to a different junction.
Make a maze for a partner
The child draws an entrance, a finish, and a few wall lines, or directs an adult to do so. Before giving the maze to a partner, trace a route to confirm that an open path reaches the finish.
If no route exists, erase part of a wall or move the finish. Explain the change and test the revised layout. An unsolvable drawing can be repaired rather than presented as a puzzle with an assumed solution.
The partner traces a route while the child checks the walls and endpoints. If the partner finds another valid path, compare it with the original. The child can decide whether the maze was intended to allow multiple routes.
Use a counter to track progress
Place a large safe counter at the entrance. Move it along an open corridor as the child directs. At a junction, stop and ask which path the counter should follow.
If a path ends, move the counter back to the junction before selecting another. The counter marks the current location and reduces the need to remember it while looking ahead.
After reaching the finish, the child can draw the route or ask a helper to trace the counter's path. If the precise path was not recorded, retrace it together before drawing. The counter is a planning aid, not an additional wall.
A maze on a flat floor plan
A simple room map can include a path around a drawn table. The child identifies the entrance, destination, and obstacles, then draws a route that does not pass through the table symbol.
A map represents a real or imagined space; its lines are not the physical walls themselves. If the child wants to follow a route in a real room, an adult checks the current space and accessibility first. The paper activity does not require walking.
If furniture moves, the old map may no longer show an open path. Update the drawing before using it as a current route. The same principle applies to a maze when a wall is added or erased.
Check the entire route
Begin at the marked start and follow the drawn line to the finish. At each wall, inspect whether the route remains in the open corridor. Check junctions where the line may pass too close to a wall.
If the line stops before the finish, extend it only through a verified open path. If it crosses a wall, revise that segment and then recheck the full route. A local repair can affect which junction is reached next.
A partner can trace the route with a finger or pointer. The child may explain one decision, such as returning from a dead end. The check concerns the actual drawing and the stated rules.
Avoid an accidental unsolvable maze
Before the child begins, trace the intended route from entrance to finish. Look for wall lines that accidentally touch or gaps too narrow for the chosen marker. A clear example should have at least one complete open route.
If the child cannot find a path, inspect the maze together rather than assuming the problem lies in the child's reasoning. An accidental closed corridor may require an adult to erase or redraw a wall.
After repairing the layout, say what changed and allow the child to start again or continue from a clear point. The revised maze is a new version, so an earlier failed route may no longer describe the same problem.
Observe and continue
A useful note might say, ‘With a wide corridor and the start marked, traced to a dead end, returned to the junction, and directed an adult to draw the second path.’ Include the model and support.
If the child crosses a line, check the distinction between walls and route, the width of the corridor, and the accessibility of the drawing tool. One maze does not establish a general navigation ability.
For related practice, try making a simple map of one room or following a two-step spatial direction. The shapes and objects activities offer an optional digital continuation.
Choose another route challenge
On another day, let the child select a simple maze or create one for a partner. Mark the start and finish and decide whether any valid route or a particular route is requested.
The child can trace first, draw directly, or direct a helper. A dead end can be investigated and abandoned. Keep the walls and route distinguishable throughout.
After reaching the finish, follow the entire line once more. A checked route communicates how to travel through the visible layout. If the layout changes, the route needs to be checked again.
A junction with three choices
Draw a wide junction with three branches. Test the layout so one branch reaches the finish and the other two end at walls. Label the starting corridor separately from the branches.
The child can choose one branch and follow it to its end. If it is blocked, return to the junction and mark that branch as tried. A large removable marker or a small note beside the entrance can help track the choices.
After finding the open route, trace it from the start to the finish without taking the dead-end branches. The child can explain how the earlier tests helped. The record should distinguish exploration paths from the final route.
A line that stops too soon
A child may draw a line through the corridors but stop before the finish. Point to the line's endpoint and the marked finish. Ask whether the two meet under the agreed rule.
Look for an open continuation from the endpoint. The child can trace it first, then extend the line. If a wall separates the endpoint from the finish, return to an earlier junction rather than drawing across the wall.
Once the line reaches the finish, check it from the start. A correct ending does not prove that the earlier part avoided every wall. Both endpoints and the full path matter.
Compare two routes through the same maze
On two transparent overlays or copies, draw different paths from the same start to the same finish. Check each against the walls. Both may be valid if the maze permits both paths.
Ask what differs: one may pass above a central wall while the other goes below it. A child can point to the separate corridors without deciding which route is better.
If the question concerns route length, use a consistent method to compare the drawn paths. Count equal marked units along each route or lay a flexible strip along them. Account for partial units instead of pretending an approximate count is exact.
A path that returns to its starting point
A maze can contain a loop. Trace a branch that eventually returns to a junction already visited. Ask the child whether the loop reached the finish or returned to an earlier place.
A removable marker at the junction can make the return visible. The child may choose another branch after recognizing the loop. Revisiting a place is not inherently forbidden unless the task states that restriction.
For a first maze, avoid loops if they make the route difficult to follow. Introduce one later as a deliberate comparison with a dead end. A dead end stops at a wall; a loop reconnects to an earlier route.
Use landmarks at a junction
Add a small tree symbol beside one junction and a house symbol beside another, without blocking the corridors. The child can say, ‘At the tree, take the upper path,’ instead of relying only on a direction word.
A partner follows the instruction and checks which junction contains the tree. If the same symbol appears twice, add a distinguishing label or use different landmarks. The cue should identify the intended decision point.
Landmarks are part of the drawing, not walls. Place them outside the route or explain their role clearly. A child can choose the symbols and direct an adult to add them.
Separate planning from drawing control
A child may choose the correct corridor but have difficulty keeping a pencil line inside a narrow space. Widen the corridor, use a thicker accessible pointer, or let a helper draw the child's selected route.
The helper can pause at each junction and ask for the next choice. The child confirms the movement before the line is drawn. This setup preserves the planning task while reducing the physical drawing demand.
If the child wants to practice drawing too, use a separate copy with wide paths. Note which support was available. A wobbly line can reflect motor control, the material, or the choice of route; it does not by itself identify the cause.
A route on an overlay
Place a transparent sheet over the prepared maze and secure it so the walls remain aligned. The child draws the route on the overlay. If a branch is unsuccessful, the mark can be erased without changing the maze itself.
Before reusing the overlay, check that the start, finish, and walls are still in the same positions. A shifted sheet can make a previously correct line appear to cross a wall.
A partner can compare two overlays with different routes. Label them if needed and check each against the underlying maze. The overlay is an optional tool for preserving the original layout and revising the plan.
What a short route description omits
A child might say, ‘Turn left and then right.’ If the maze has several junctions, the listener may not know where to make those turns. Ask the child to point to the first junction or name a landmark.
Add enough detail to follow the intended path: ‘At the tree, turn left; at the next junction, turn right.’ The partner traces the directions and reports where they end.
If the partner reaches a dead end, compare the spoken instruction with the drawn route. The child can revise a word or specify a junction. This check concerns the clarity of the directions as well as the maze path.
Helpful answers
What if the child reaches a dead end?
Return to the nearest junction and try another open path. A dead end describes one branch, not necessarily the whole maze.
Can a maze have more than one correct route?
Yes. Any path that meets the stated start, finish, and wall rules is valid unless an additional criterion is specified.
Should an adult test the maze first?
Yes. Check that the start and finish are clear and at least one open route exists.
Can a helper draw the line?
Yes. The child can choose the path and direct a helper through an accessible communication method.
What if the route crosses a wall?
Point to the crossing, return to an open junction, revise the route, and check the entire line again.

Turn a little idea into an adventure.
Try a short activity together, then bring the discovery back into your day.
Shapes and object practice