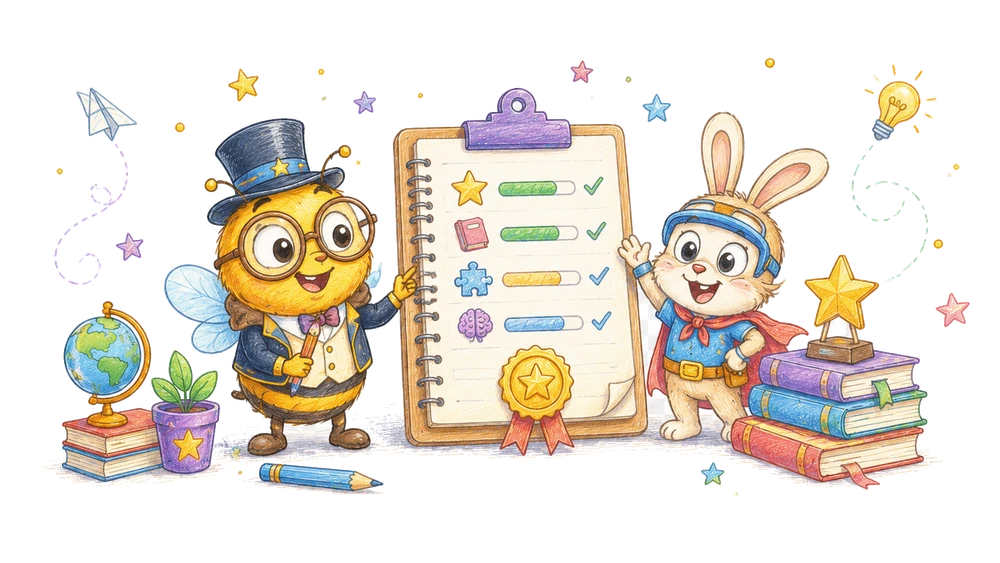
A paper sign offers a practical project with a clear purpose: choose a message, make it, and decide where it belongs. The child can revise the plan when new information appears.
Plan a small project in three steps
A short project plan can help a child turn an idea into an action and notice when a plan needs to change. This example makes a paper sign for a toy shelf: choose the message, make the sign, and decide where to place it.
The goal is to identify a sequence, gather what is needed, and review whether the result serves the child’s purpose. A child can write, draw, point, or direct an adult. The plan is adjustable and does not require finishing all three steps in one sitting.
Choose a purpose
Ask the child what they want the sign to communicate. It might mark a shelf for blocks or show where a favorite toy belongs. The child can choose another project, provided the materials and location are suitable.
The sign should solve a real problem for its maker or be an enjoyable idea, not a task invented solely to fill time. If the shelf is shared, ask the other users before changing how it is labeled or organized.
Prepare the materials
Use a sheet of paper, a suitable drawing tool, and a way to place the sign that will not damage the surface. An adult handles scissors or adhesive when appropriate and checks whether the intended location is safe and accessible.
A sign can be drawn on a whole sheet without cutting. If attaching it is not possible or permitted, the child can place it beside the shelf or keep it as a design. Avoid writing private information that is unnecessary for the sign.
Step one: choose the message
Ask, “What should someone understand when they see your sign?” The child might choose “Blocks go here” or draw a block. They can dictate the words, write them, select a symbol, or combine an image with a short label.
Before making the final sign, show the proposed message to the child and ask whether it matches their idea. A sign for a shared area should be discussed with other users, especially if it suggests a new rule.
Step two: make the sign
The child writes or draws the chosen message on paper. An adult can make marks under the child’s direction. Ask before adding a picture or changing the wording. Make the letters or image large enough for the intended viewer to see.
If a mistake occurs, ask whether the child wants to cross it out, use another sheet, or keep it. The purpose is a usable message, not perfect lettering. Choose a safe, appropriate material for the actual surface.
Step three: choose a location
Take the sign to the proposed shelf and ask where it should go. Hold it in place temporarily while the child checks visibility. If another person uses the shelf, confirm that the location is acceptable before attaching it.
A place may be too high, blocked by an object, or unsuitable for adhesive. If so, ask the child to choose another location or keep the sign unattached. The adult handles any attachment that requires assistance.
A sample planning conversation
Adult: “What is your sign for?” Child: “To show where the blocks go.” Adult: “What should it say or show?” Child: “A picture of blocks and the word blocks.” Adult: “Then we can make it and decide where to put it.”
After making the sign, the child holds it near the shelf and notices that a box covers the chosen spot. The adult asks, “Would you like another place?” The child points to an open area. The plan changes based on a real check.
Write the three steps in order
On a separate page, write or draw: 1. Choose the message. 2. Make the sign. 3. Choose a location. The child can use symbols or ask an adult to write the words. Point to each step before beginning.
This list is a reminder, not a rule that the child must follow without revision. If a location needs approval first, move that check earlier. A plan should reflect the actual project and the people affected by it.
Check what is needed
Before drawing, look for paper and a suitable tool. If the child wants the sign attached, check whether an appropriate method is available and permitted. Do not promise a particular adhesive will be safe for a surface without knowing its instructions.
If a material is missing, choose a substitute or revise the plan. A sign can be placed in a holder or kept as a paper design. The child can decide whether the revised project is still worth doing.
Review the message with a listener
If the child wants feedback, show the sign to someone who did not help make it. Ask, “What do you think this sign tells you?” The listener can describe the message and the child can confirm or clarify.
If the listener guesses incorrectly, the child can add a word, change a picture, or explain the intended meaning. Do not change the sign without asking. A listener’s confusion is information about the communication, not a judgment of the child.
Change a step when the plan does not fit
Suppose the sign will not fit in the chosen space. Compare its size with the available area and ask whether the child wants to fold it, make a smaller version, or choose another location. An adult helps with cutting only if needed and appropriate.
If the surface cannot be used, the plan may end with a design rather than an attached sign. A revised outcome can still meet the child’s purpose if the child agrees. Do not force the original plan after its constraint is known.
Separate an idea from a commitment
A child may list “make five signs” while exploring possibilities. Before beginning, ask which one they actually want to make and what materials are available. Ideas on a planning page do not create an obligation to complete each one.
If the child changes their mind after the first sign, discuss what to keep and what to put away. The plan can be updated to match the new goal. Ending a project is a decision, not automatically a failure.
A simpler project
Choose a single paper label for a box: decide what it should show, draw one symbol, and place it beside the box. An adult can provide the paper and move it under the child’s direction. One mark can be enough.
If even three steps are too many at once, show the first step and return to the list after it is finished. The child can stop at any point. No written checklist is required.
A more complex project
If the child wants, add a review before making the final sign: draw a draft, show it to a listener, and revise the message. These actions can fit inside the “make the sign” stage or be listed separately as a revised plan.
Another extension is to create signs for two agreed locations. Check each location and message separately. Do not assume the second shelf has the same owner, surface, or need as the first.
Plan with a partner
Two people can share the work: one proposes a message, and the other suggests a location. Each should have a chance to accept or change the plan. They can switch tasks if both prefer.
Before adding a mark to another person’s drawing, ask permission. If their goals conflict, consider two separate signs or another shared project. The adult can help articulate options without choosing a winner.
Make participation accessible
Place paper and examples where the child can see and reach them, and allow time for a response. The child may choose a message through speech, pointing, a communication device, or directing a partner to draw.
An adult can hold the sign in different places for the child to compare. Confirm an unclear signal before attaching anything. Independent handwriting, cutting, or climbing to a shelf is not required.
A common mistake: making the plan too large
A sign project can expand into reorganizing every shelf, making labels for the whole room, and teaching someone else the system. Those additional tasks may not match the child’s original goal or the available time.
Return to the chosen purpose: one sign for one agreed location. The child can add another project later if they want. A small complete plan is easier to review than a long list of unchosen duties.
A common mistake: treating the checklist as fixed
If the child discovers that the intended surface cannot hold a sign, continuing to the original location would ignore new information. Update the plan: choose another location or make a sign that can be displayed without adhesive.
Show the revised step on the planning page if the child wants a record. Crossing out a step or adding a note is a normal part of planning. The adult should explain constraints without taking over the child’s decision.
Notice the child’s decisions
Afterward, ask whether the sign communicates the chosen message and whether the location works. The child may point out a blocked view, request a change, or decide the paper design is sufficient.
Do not use the number of steps completed as a score. Choosing to pause or revise can show useful planning. One project is not a developmental assessment and need not be compared with another child’s work.
Identify the intended reader
Before choosing the words, ask who the sign is for. A sign the child uses alone may need only a familiar picture. A sign for someone else may need a label or an explanation of the picture. The child chooses the intended reader and can revise that choice.
If the sign describes a shared shelf, ask the other users what information would help them. A label can describe what is stored there without imposing a new rule. A proposed rule should be discussed with the people it affects.
The child may decide that no sign is needed after all. That is a useful conclusion from considering the purpose. The materials can be used for another idea or put away.
Choose between a word and a picture
Offer two possible designs for the same message: the word “blocks” or a picture of the blocks that belong on the shelf. The child can choose either or combine them. Ask which will be easiest for the intended reader to understand.
A picture may be ambiguous if other objects look similar. A word may not help a reader who does not use that written language. A short test with a willing listener can reveal whether the chosen design communicates the intended meaning.
The adult can write or draw under the child’s direction. Do not assume that the child must use an English word if another language or a symbol is more useful in the household.
Make a first draft
Use a spare sheet to try the message before deciding on the final size. The child can draw a block, write a word, or ask the adult to make a sample. Explain that a draft is a place to try an idea and can be changed.
Hold the draft near the intended location and check whether the image or lettering is visible from where the reader will be. If the shelf is high or partly blocked, choose a safe way to inspect it with adult help.
The child may decide that the draft already works as the sign. A separate polished version is optional. The purpose is communication, not producing multiple sheets.
Ask a listener to interpret the draft
Show the draft to a willing person who knows the shelf but was not involved in designing the sign. Ask, “What do you think this means?” The listener can say, “Blocks belong here,” or describe what they see.
If the listener thinks it labels books instead, ask the child whether they want to clarify the picture or add a word. The listener’s interpretation reveals how the message is received; it does not prove that the child drew incorrectly.
A listener can decline to participate. Do not require the child to show a personal project to someone they did not choose. The child may review the sign with the adult instead.
Check the available space
Hold a piece of paper near the proposed spot without attaching it. Ask whether it fits without covering a handle, label, or object that someone needs. A child can point to a position while an adult holds the paper.
If the paper is too wide, options include folding it, choosing a smaller sheet, or using a different location. An adult can help cut paper when appropriate. Ask the child which option still preserves the message.
A sign that fits physically may still be hard to see. Check it from the intended reader’s position. Do not climb on furniture or move a heavy object for the activity.
Review the attachment method
A paper sign can sit in an existing holder, rest beside a box, or be attached with a method approved for the surface. Follow the actual material instructions and ask the person responsible for the surface. Some tapes can leave residue or damage finishes.
An adult handles attachment when needed and keeps tools appropriate for the children present. If no suitable method is available, keep the sign unattached. The child can still test the message by holding it near the intended place.
Do not invent a guarantee that a particular adhesive is harmless. The practical choice depends on the product and surface. The plan should record the method only after it is known.
An obstacle discovered during the project
The child plans to label a block box, but the box already has a label chosen by another person. Pause and ask what the child wants to communicate and whether the existing label already does that job.
The group may agree to keep the old label, add a separate picture, or choose a different container. Any change to a shared item needs the users’ agreement. The child’s original idea can be adapted without removing someone else’s work.
Update the planning page if useful: “Ask about the existing label” can become an earlier step. A plan changes when new information appears.
Separate supplies from steps
A list of supplies might contain paper and a marker. The steps describe actions: choose a message, make a sign, and choose a location. The child can show the difference by placing supply names in one area and action words in another.
If the marker is unavailable, the child can choose another suitable tool. That changes the supply list but may leave the three actions intact. If the location is unavailable, the final action itself may need to change.
A child can draw the supplies instead of writing their names. The distinction helps the child check readiness without requiring a formal project-management format.
Estimate time without promising a result
Ask whether the family has time to choose a message now and finish the sign later. A small project can be paused after a draft. Avoid asserting that every child can complete it in a fixed number of minutes.
If the family must leave soon, decide where the paper and tool can be safely put away. When returning, check whether the original idea and location are still appropriate. The child can continue, revise, or stop.
A timer can help a family manage an actual schedule, but it should not turn drawing or communication into a speed test. The adult explains any real deadline before the child begins.
Use a checklist as a memory aid
The child can draw three boxes beside the chosen steps and mark one after deciding it is complete. For example, the first box is marked after the message has been chosen. An adult can mark the box at the child’s direction.
If the message changes later, the child may leave the mark and add a note, or make a new list. The checklist represents the plan at a particular time. It is not a permanent score of obedience.
A child who does not want a checklist can talk through the steps or place three objects in a row as reminders. Use the form that makes the project easier to follow.
A sign for a box rather than a shelf
The child may prefer to label a box of paper scraps. Step one is choosing the message, such as a drawing of paper. Step two is making it. Step three is deciding whether to place it on the box or beside it.
Check that the box is actually used for that purpose and that the label does not cover information someone needs. If the box is shared, ask its users before changing the label.
A box label and a shelf sign are separate possible projects. Choose one for the activity instead of requiring the child to make both. The same planning questions can be used for either.
A project without attaching a sign
The child can create a paper design for an imaginary library or a pretend toy store. Choose what the sign should communicate, draw it, and decide where it would go in the imaginary setting.
A listener can ask what the symbols mean. The child may revise the design or explain it without changing the page. The location can be indicated on another drawing rather than a real surface.
This version is useful when no shared surface is available. It should be described as an imagined placement, not as a sign that has been installed in a real location.
When the listener offers a different idea
A listener may suggest replacing the child’s block picture with a word. Ask the child whether the suggestion helps the intended reader. The child can accept, adapt, or reject it.
The adult can explain a practical concern, such as a picture being too small to see from the shelf. Show the problem and offer choices. Do not make the change without the child’s agreement.
If the location is shared, the other user’s needs also matter. The group can seek a design both understand or choose separate spaces. Feedback informs the plan rather than automatically deciding it.
Document the change in a plan
The first plan says “put the sign on the shelf,” but the shelf surface cannot be used. With the child’s agreement, write “place the sign beside the box” as the revised step. Keep the earlier wording visible if the child wants to remember why it changed.
A note can be drawn or dictated. It does not need to include a personal explanation or a score. The useful information is the new action and, if desired, the constraint that led to it.
If no placement is available, the final step may be “save the design.” The child can decide whether that is a satisfying outcome or whether to end the project.
Review the finished message
Stand or sit at a safe viewing point and look at the sign. Ask the child: “Can the intended reader see the picture or words from here?” The child may ask a listener to check or may decide the current position works.
If an object later covers the sign, the location can be reconsidered. A successful review describes the actual arrangement; it does not promise that the sign will remain visible forever.
The child may choose to remove the sign if it no longer serves a purpose, provided removal is appropriate for the surface and ownership. An adult can help without damaging the area.
Continue on BrainHunters
If the child wants a separate screen activity, explore letters on BrainHunters together and read the instruction shown. The activity may practice a different skill from planning a sign.
The paper project is not automatically recorded on the site. A screen is optional; discussing the message and its placement can be complete without one.
Helpful answers
Must the child finish all three steps at once?
No. The project can pause or end at any point, and the plan can be revised.
What if the sign cannot be attached?
Choose another permitted location or keep it as a design. Check surfaces and materials with an adult.
Can a child participate without writing?
Yes. They can choose a symbol, point, dictate, or direct a partner to make the sign.
Turn a little idea into an adventure.
Try a short activity together, then bring the discovery back into your day.
Letters and early reading practice